
Understanding Load Paths Digital Engineering
Download this free Understanding Load Paths Digital Engineering and use it right away. Optimized for A4 and Letter paper, all 35 designs are ready to print without editing software. No sign-up required.
How to Use This Understanding Load Paths Digital Engineering
- Browse the collectionScroll through the Understanding Load Paths Digital Engineering designs above and click any image to open it full size.
- Download the imageHit the Download button to save the full-resolution file to your device.
- Print on standard paperUse A4 or Letter paper. Select 'Fit to page' in your printer settings to ensure nothing is cut off.
- Use immediatelyNo editing, software, or account needed — it's ready the moment it comes out of the printer.
More Understanding Load Paths Digital Engineering Templates
 How To Draw And Analyse Free Body Diagrams FBDs ILearn Engineering
  DIAGRAM Cantilever Beam Free Body Diagram Of Skateboard MYDIAGRAM
 DIAGRAM Free Body Diagram Torque Example MYDIAGRAM ONLINE
 Cantilever Beam Free Body Diagram Free Wiring Diagram
 Cantilever Free Body Diagram
 Solved The Cantilever Beam Shown Is Subjected To A Moment At Chegg
 Free Body Diagram Of Cantilever Beam With Integrated F 2 MC Tubes
 Draw The Free Body Diagram For The Cantilevered Beam A Is The A Fixed
 Draw The Free body Diagram For The Cantilevered Beam
 41 Cantilever Beam Free Body Diagram Modern Wiring Diagram
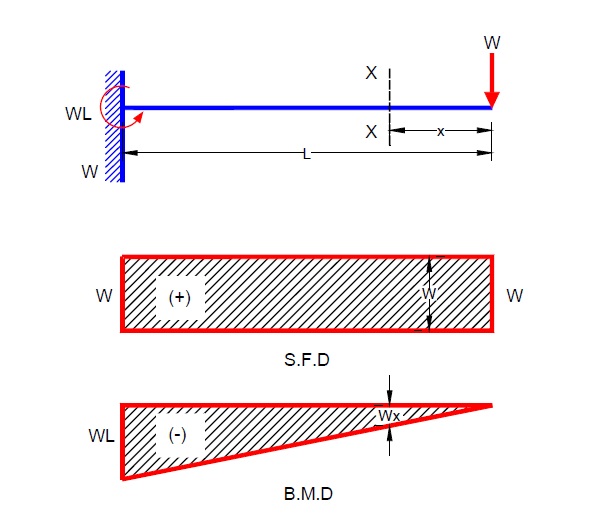 Civil Engineering Shear Force And Bending Moment Diagram For
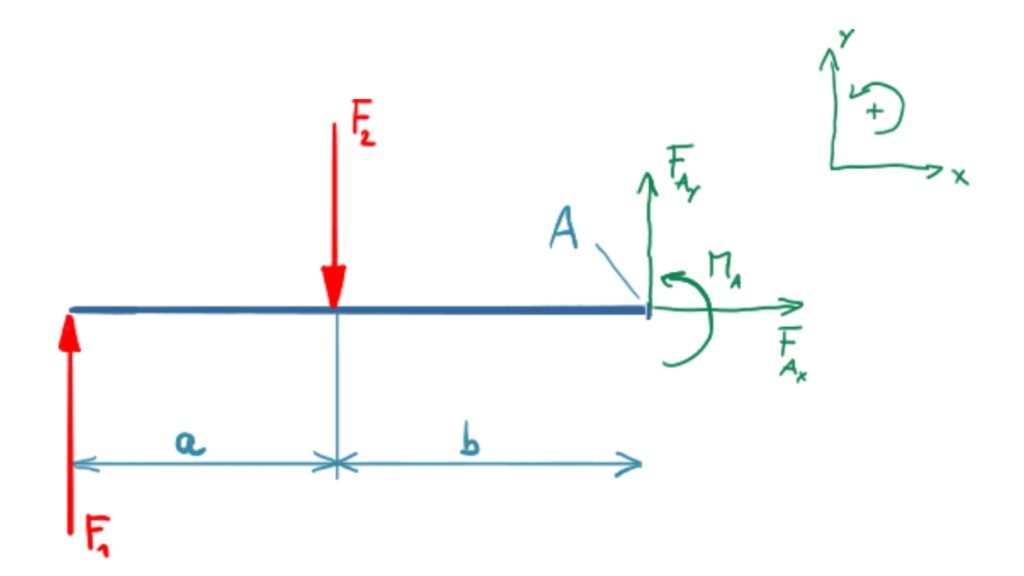 41 Cantilever Beam Free Body Diagram Modern Wiring Diagram
 41 Cantilever Beam Free Body Diagram Modern Wiring Diagram
 Cantilever Beam Shear Force Bending Moment Diagram YouTube
 29 Draw The Free Body Diagram For The Cantilevered Beam A Is The A
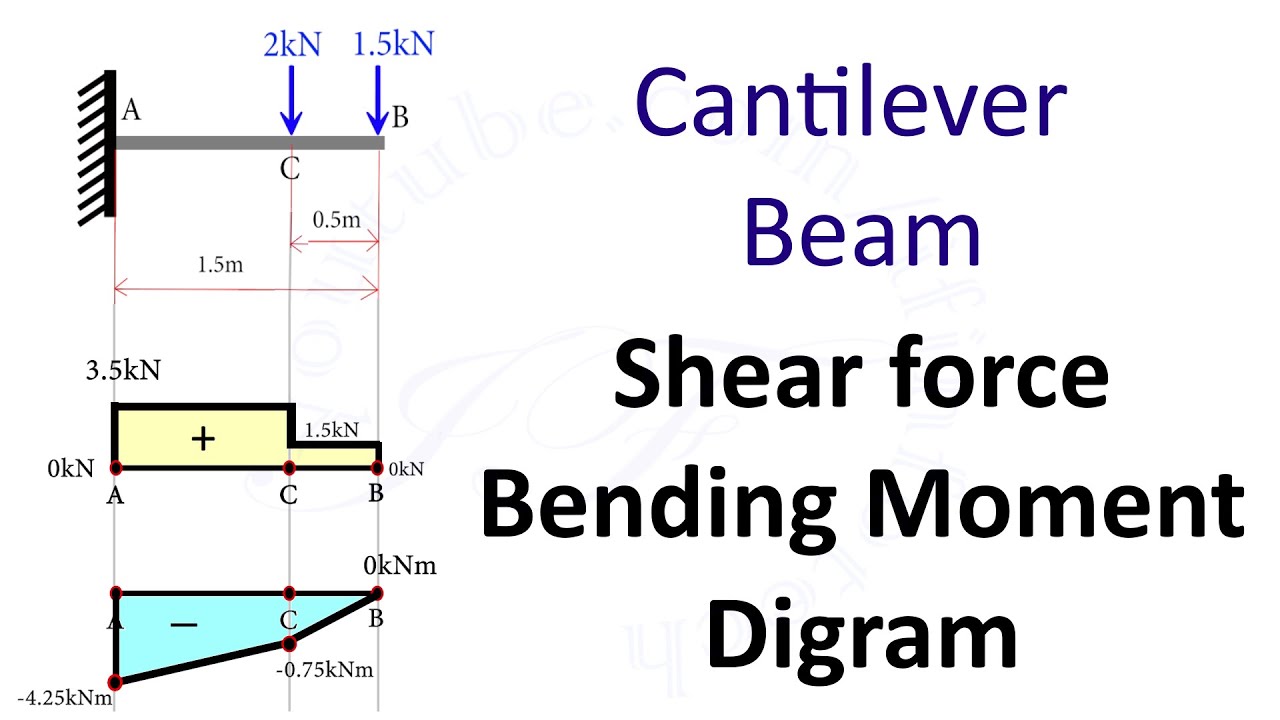 Cantilever Beam Shear Force And Bending Moment Diagram SFD BMD
 Draw The Free body Diagram For The Cantilevered Beam
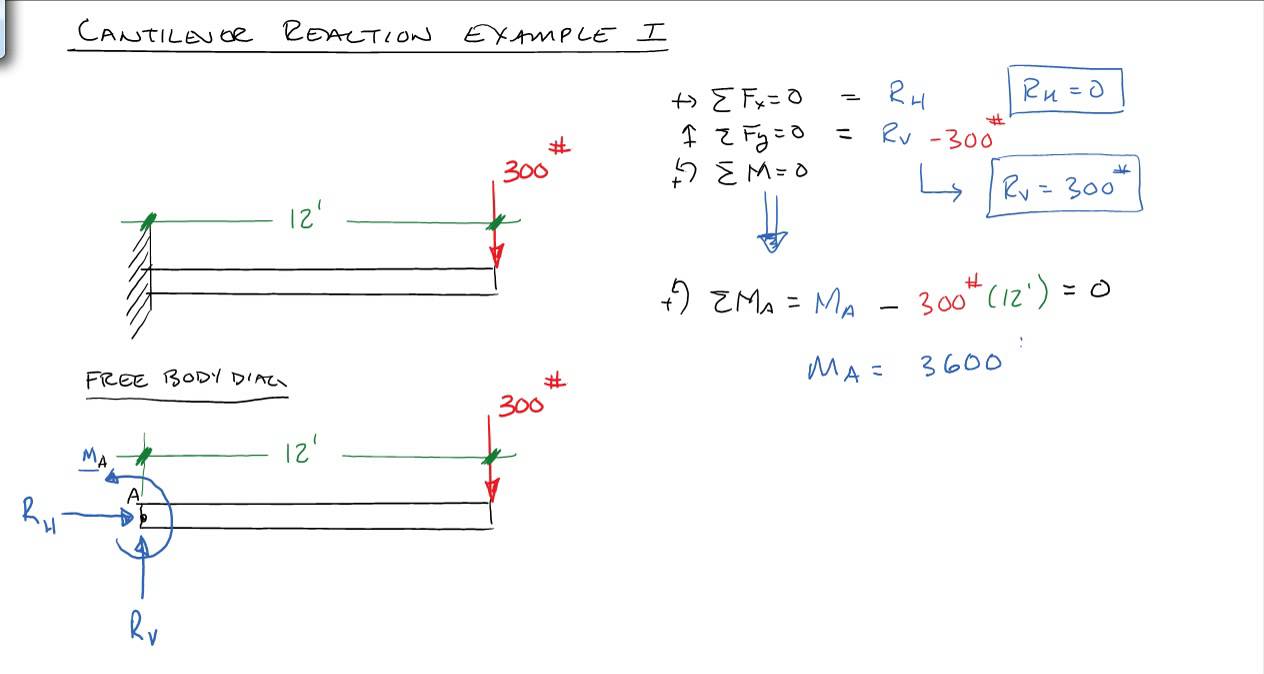 Cantilever Beam Free Body Diagram Hanenhuusholli
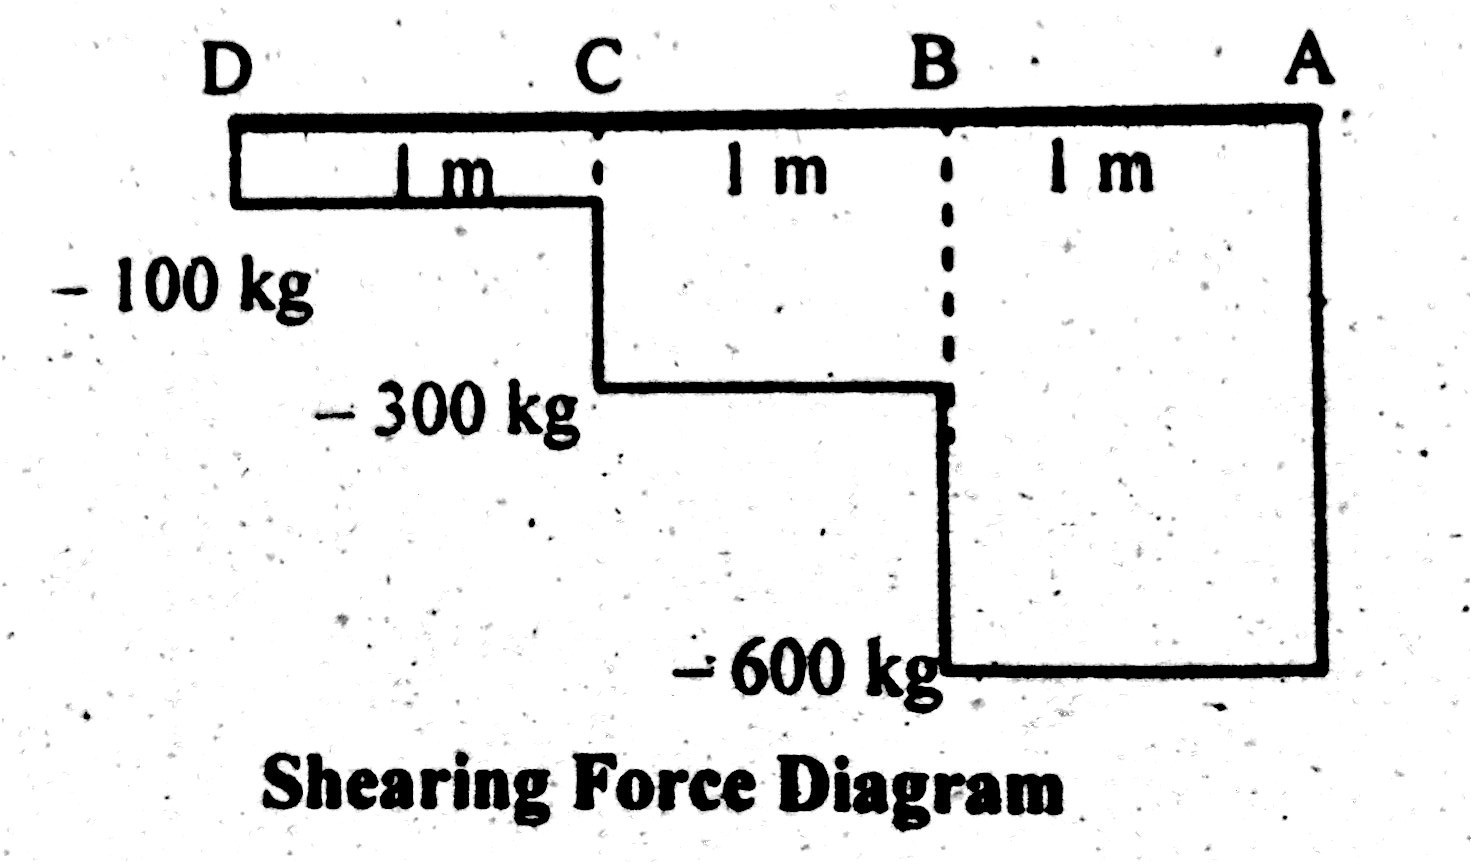 Draw The Free Body Diagram For The Cantilevered Beam A Is The A Fixed
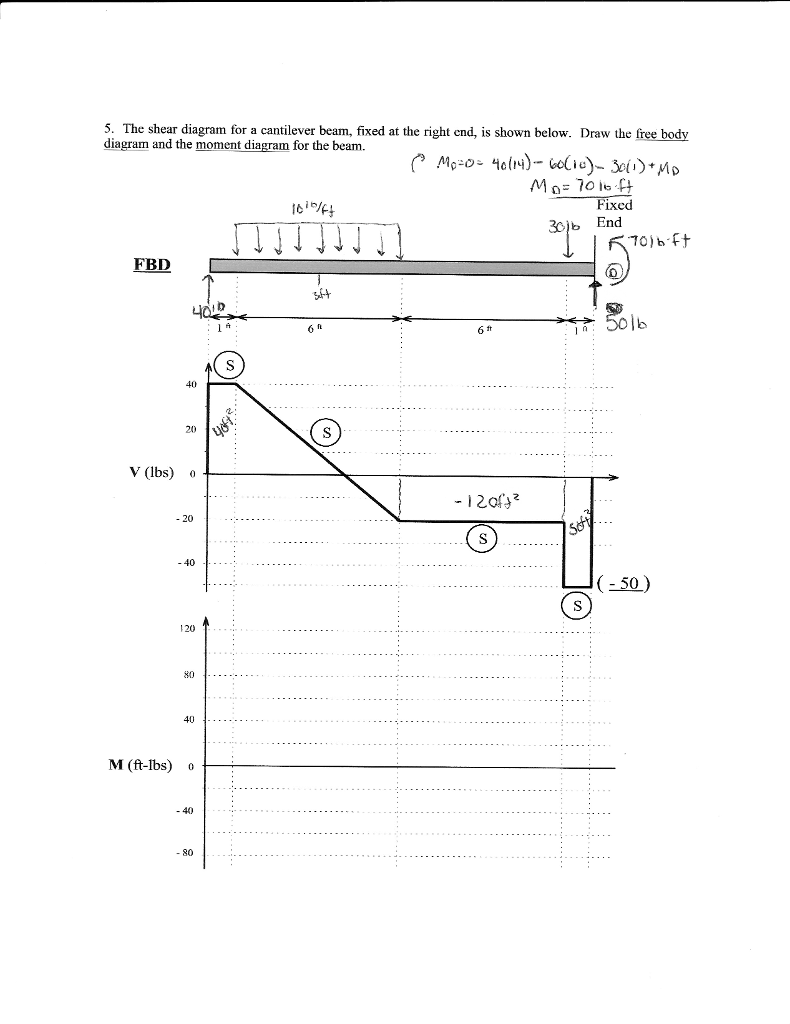 Solved 5 The Shear Diagram For A Cantilever Beam Fixed At Chegg
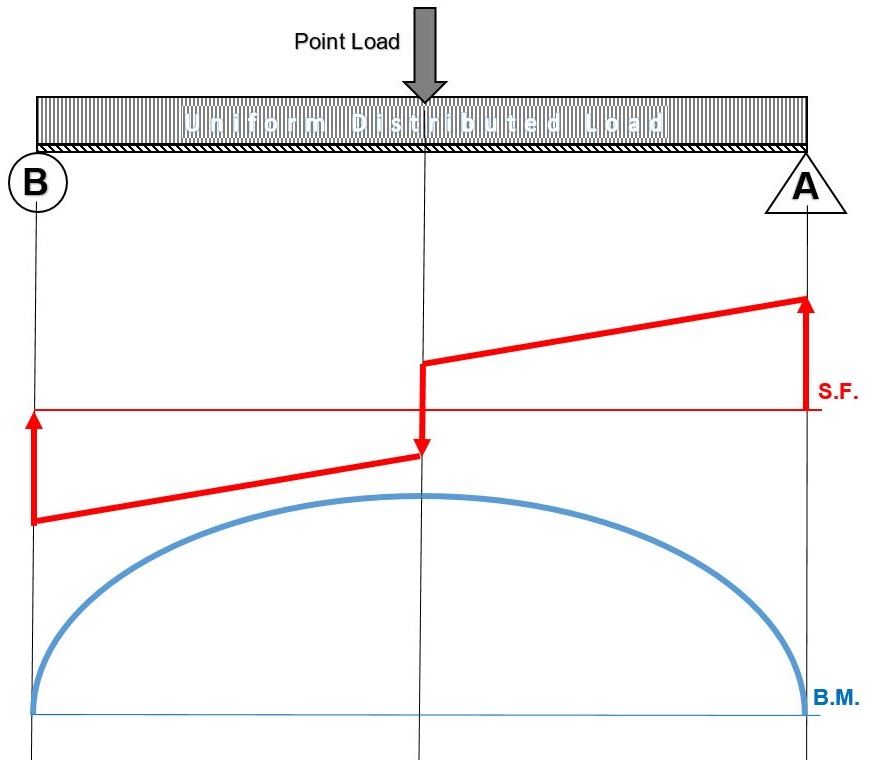 Cantilever Beam Free Body Diagram Hanenhuusholli
/05. Balanced Cantilever Bridges/Figure/Balanced Cantilever Bridges_figure_(9).png) Balanced Cantilever Bridges Solutions MidasBridge
Balanced Cantilever Bridges Solutions MidasBridge Given A Wall mounted Cantilever Beam And A Point Load At The Free End
 Cross section Of A Typical Cantilever Retaining Wall Download
 PDF Vibration Of Spinning Cantilever Beams Undergoing Coupled Bending
 Free Body Diagrams YouTube
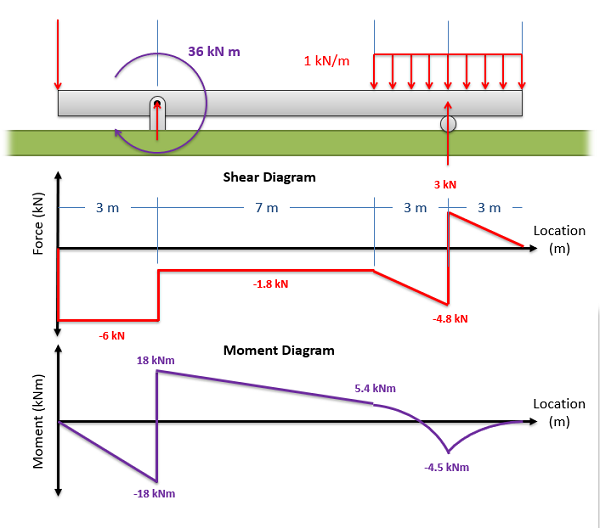 Mechanics Map Shear And Moment Diagrams
 Moment Area Method By Parts Example 1 Cantilever Beam With Two Loads
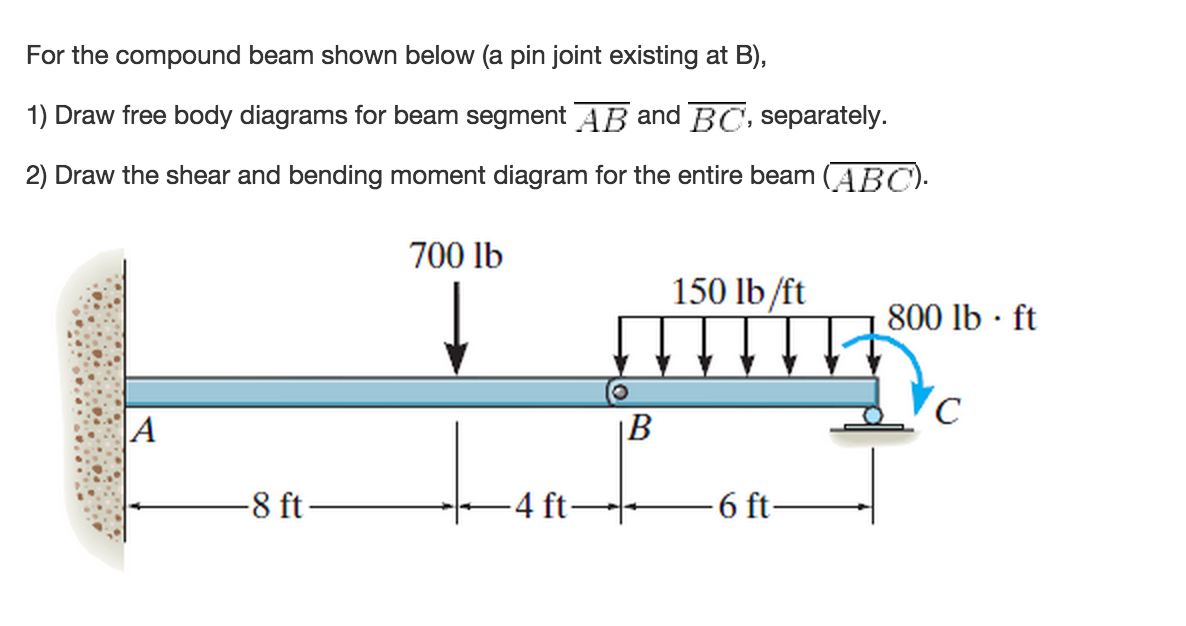 DIAGRAM Cantilever Beam Body Diagram Of Skateboard MYDIAGRAM ONLINE
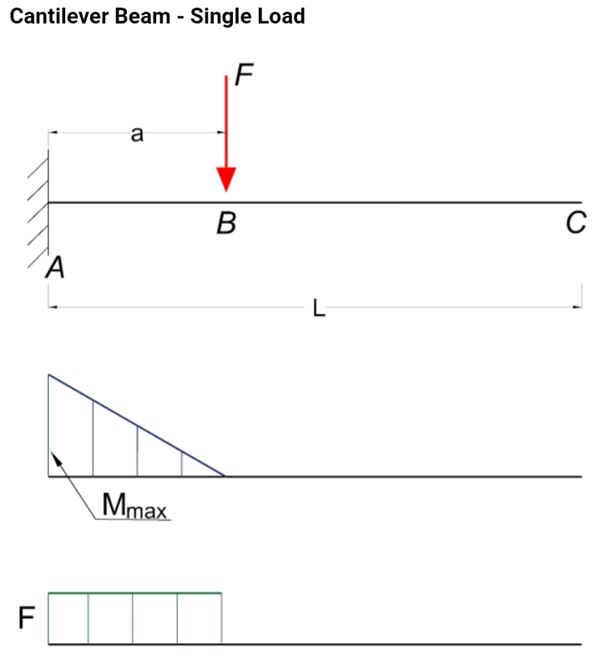 Free Body Diagram Cantilever Beam
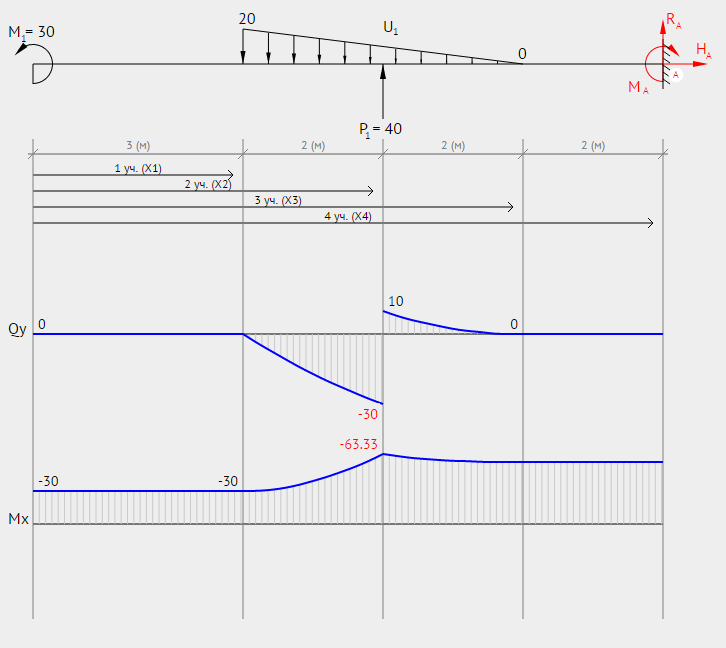 Cantilever Beam Free Body Diagram Hanenhuusholli
 Shear And Moment Diagrams S B A Invent Body Diagram Nursing
 Free Body Diagram Showing The Forces On The Cantilever Wire Download
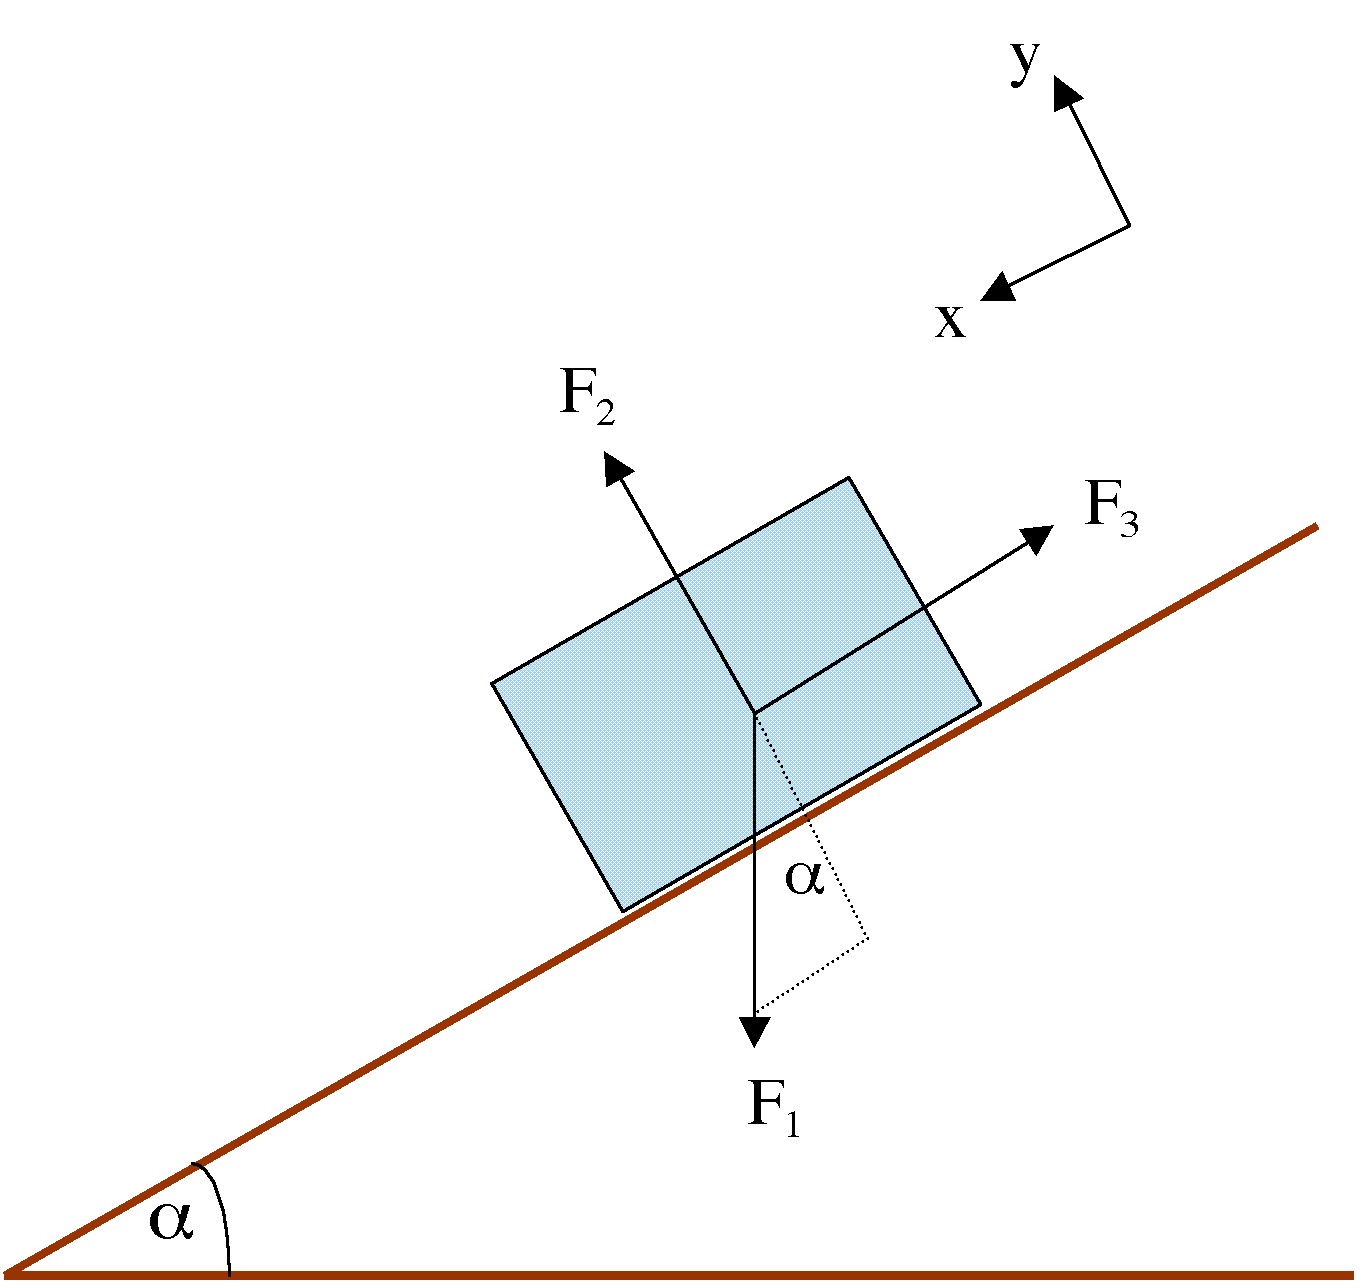 West Delaware Physics Free Body DiagramsUnderstanding Load Paths Digital Engineering
Frequently Asked Questions
Is this Understanding Load Paths Digital Engineering free to use?
Yes, 100% free. Download and print without creating an account or providing your email address.
What paper size does this template support?
Templates are designed for A4 and US Letter paper. Select 'Fit to page' in your printer dialog for the best fit.
Can I print multiple copies?
Yes. Once you download the image, you can print it as many times as you like for personal or educational use.